Cult of PiN How to Beat Bosses
Read the telegraphs, melt the wall, claim the bonus table.
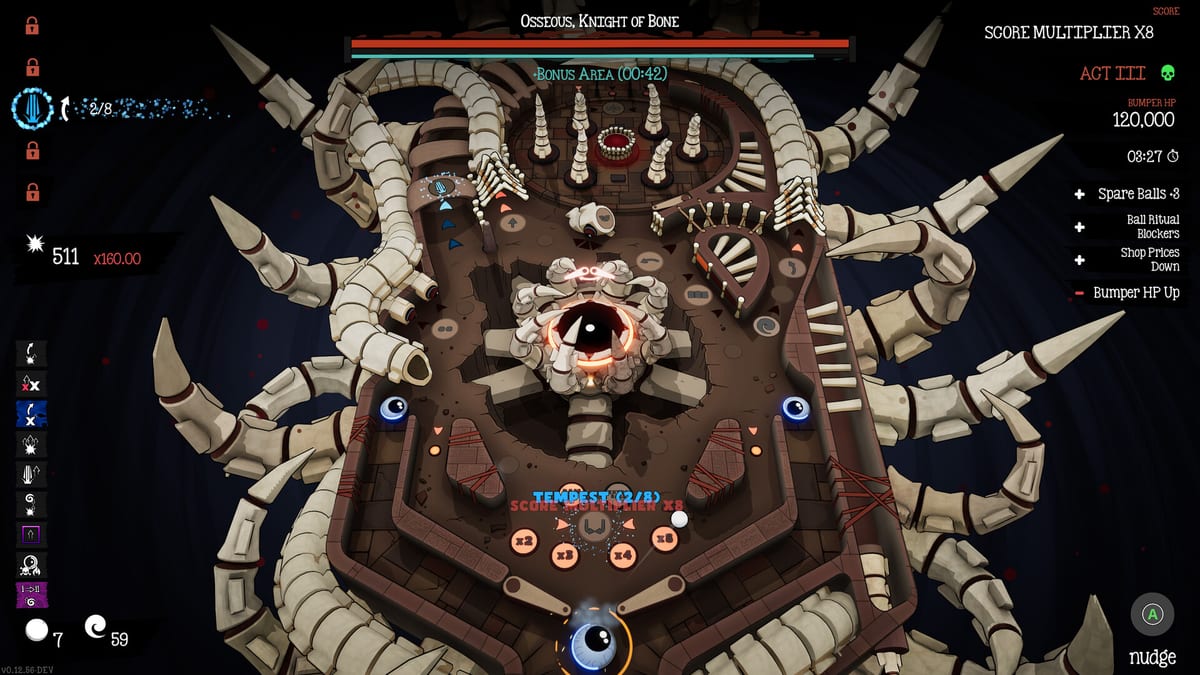
Boss Bumpers are the Act finale: higher HP, spell casting, and a tentacle wall that blocks clean shots. Beat them fast or they start devouring spare balls.
Telegraph window
Boss spell icons appear roughly three seconds before casting. Use that beat to cradle safely or reposition. Spells can include gravity shifts, lane-blocking tentacles, and blackout effects.
Resistance while casting
Bosses are highly resistant while casting — do not empty your best lines into immunity frames. Wait the telegraph, dodge the effect, then punish.
Tentacle walls
Clear or bypass the wall to reach the boss body. Multiball and wide Rituals help, but raw panic flipping often feeds drains instead.
Timer pressure
Failing to kill quickly unlocks the spare-ball tax. That is also why bonus areas exist: speed is rewarded. See Bonus Tables.
Build checklist before the fight
Mission damage ramps done? Ritual upgraded? Glyphs that actually hit bumper HP bought? Use Build Planner and Glyph Tier List.
Mechanical prep
Cradle & Nudge keeps you alive when spells shove the ball. Controls Peek helps track tentacle spawns.
Difficulty modifiers
Higher difficulties shorten boss timers and change blockers. Read Difficulty Guide before blaming the boss kit.
Mindset
A boss is a readable pattern plus a damage check. If you cannot read it, slow down. If you can read it but lack damage, fix missions and Glyphs, not just flip speed.
Boss rehearsal method
Spend one run intentionally dying to learn spell order. Spend the next run racing. Alternating study and execute prevents both cowardice and recklessness.
Damage windows
Post-cast windows are sacred. Pre-cast windows are for positioning. During-cast windows are for survival. Memorise that triangle and your Glyphs start looking smarter.
Spare-ball accounting
Enter bosses with a planned minimum spare count. If you are below it, skip bonus greed and play for clear. Bonus Tables are optional power — Act VI is the real door.
Timer and spare economy
Bosses still punish slow kills by devouring spares. Entering a boss soft-locked is now recoverable with Abandon Ball, but the spare cost is real. Bonus skips that cost nothing remain available after you earn bonus access.
Table-specific hotfix awareness
Table 3 spawn/decoy issues, Table 4 decoys, Cult of Blood Act V tentacle stones, and Cult of Bone reflect angles all received post-launch attention. If a boss feels wrong, update the game before rewriting your whole build.
Telegraph checklist
- See the icon early.
- Cradle safe or reposition.
- Respect casting resistance — do not dump Rituals into immunity frames.
- Clear or bypass tentacle walls.
- Recheck spare count before committing overkill lines.
If the fight extends, remember devour pressure and whether a Bonus skip later can conserve resources. Update-aware players also watch for table-specific boss spawn fixes before blaming their Glyph bag.
Page takeaway
Respect telegraphs, casting resistance, and tentacle walls. Enter bosses with spare buffer because devour timers still punish slow kills even when Abandon Ball can rescue a soft-lock mid-fight.
Table-named boss patches
Table 3 spawn and decoy despawn, Table 4 decoys with Sparks or Inferno, Cult of Blood Act V tentacle stones, and Cult of Bone lower-bouncer angles all received launch-week attention. If a boss “feels illegal,” update the game before rewriting your Glyph bag.
Telegraph order stays the same: see the icon, cradle or reposition, respect casting resistance, clear or bypass the tentacle wall, then dump damage. Spare economy still matters because devour timers punish slow kills. Abandon Ball can rescue a mid-fight soft-lock, but it costs a spare on main Acts — do not treat it as a free reposition during the timer.
Frequently Asked Questions
Quick answers to the most common questions.
Why is the boss immune?
High resistance during spell casts — wait out the telegraph.
How do I unlock bonus areas?
Defeat the boss quickly — Bonus Tables.
What if I keep losing spare balls?
Improve cradle saves and kill speed; see Cradle & Nudge.